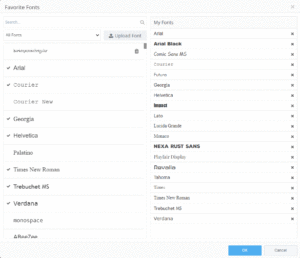
Experios comes with a wide variety of fonts available for selection by default. As well as this, additional fonts can be incorporated by uploading via the Text Toolbar, or the font selection dropdown when creating styles.
You can find the Experios font options by adding a text element to a project and selecting ‘Add more fonts…’ from the Fonts dropdown menu to the far left of the Text Toolbar. This will bring up the Favorite Fonts panel.

The Favorite Fonts Panel consists of two columns. The fonts in the column on the right-hand side (My Fonts) are currently available for selection in your projects. Unneeded fonts can be removed by clicking on the x icon to the right of a font name.
The left-hand column contains a list of system, Google and custom fonts that can be added to your projects. You can filter this list using the search box above, and toggle their availability by clicking on the required fonts – a tick signifies that the font is available in My Fonts.
You can also upload your own font files using the Upload Font button. Allowed font formats are .ttf, .otf and .woff. Once uploaded, your fonts will automatically be moved into the My Fonts list.
To select a font after it has been added to My Fonts, click on the Font dropdown menu on the Text Toolbar.
